
Due to a clash with some of the Thermal competition events, we have moved 4 of our event dates so we can attend both. Please refer to the events page for the new calendar
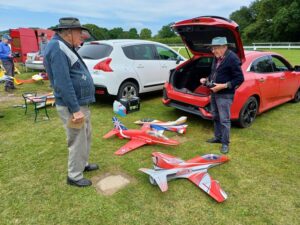
Roger (Rocket) Roberts
Roger (Rocket Rog) Roberts who passed away shortly before Christmas was a long time member of DSSC. Roger flew a variety of models including a 4 Mtr Fox but his favorites were EDF warbirds. Roger was well known for pushing his aircraft through aerobatics and for bringing several models along just in case a landing didn’t go well.
In recent years, Roger also joined another Model Flying Club that was closer to his home and he was a regular at their patch. Here Roger again enjoyed pushing his EDF models and his Spitfire through speedy aerobatics and earned his nickname of “Rocket Roger”. Roger was also interested in other members aircraft and was supportive when any problems occurred. During his 90th year in 2024, Roger organised a Battle of Britain themed day with a variety of Spitfires, Lancaster’s and other aircraft of the era.
We will surely miss Roger.
L.H Jan 3rd
Go to the Gallery page to see a few pictures of the 1st outing for 2025 at L.H.
2025 Events Calendar is published
See our events page for the glider day date events. We will decide whether the Saturday or Sunday gives the best weather, the Friday before the event.
New Site Permit
A new site permit for Little Haldon that is valid until July 2025 has been added to the documents section. Briefly, the BMFA under the terms of its CAA Model Aircraft Article 16 Authorisation (UAS7068) permits the operation of model aircraft (excluding multi-rotors) with an MTOM between 7.5Kg and 25Kg at heights exceeding 400ft above ground level (but not exceeding 1500ft) by its members at our model flying site.
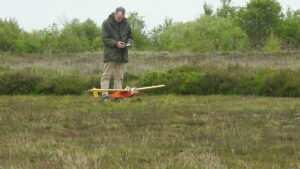
June Glider Day
Although the conditions were not at their best for June, with fairly low cloud cover and a Easterly breeze, we had a fair turn out and some interesting flights. There was some lift about but height was limited due to low clouds. All pilots had several successful flights and some used the opportunity to practice spot landings. We also enjoyed watching Dave Ramsden maiden his own designed ‘Little Tugger’ that will eventually be used to tow some of our smaller gliders. The Little Tugger certainly demonstrated ample thrust. And it’s also fun to watch a Lidl RC conversion – this time by John Hacker.

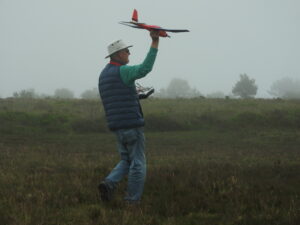
e-Glider Event at Little Halden Sunday 26th May
Hopefully the weather will allow our e-Glider event to go ahead this Sunday. The pilots briefing will be at 10:45 (the website previously showed 10am) .
Okehampton Aero Tow Sunday 2nd August
Okehampton club has invited us to their next Aerotow on 2nd August. See their website at http://www.okehamptonmfc.org.uk/?page_id=798
Old Phoney – Part 2 the wing build
Like most of my designs, the Old Phoney is a combination of ideas gleaned from other designs with a handful of my own thrown in for good measure. The wing shape is a cross between Black Magic and PD Parasol but the construction is completely different. Also the ailerons are much bigger and almost full-length. I figured that large surfaces with small deflections are probably more efficient than small surfaces with big deflections. I also wanted the ailerons to provide variable camber (flaperons) to (hopefully) give a wide range of possible airspeeds from ‘slow half-power vintage-style’ right through to ‘flat-out throwing it about a bit’. The aerofoil section is semi-symmetrical copied from the PD Parasol and Peter Miller’s Peggy Sue II – both very manoeuvrable models. I also wanted a smallish amount of dihedral – partly for looks but also to give me the option of flying rudder/elevator which I still like to do sometimes – but not so much dihedral that manoeuvrability was compromised.
Lightweight slightly aerobatic high-wings often gain rigidity by having struts (e.g. Cub J3). I wanted the rigidity without the struts so I added a bit of weight in the form of a couple of 8mm carbon tubes I had left over from a previous build. The additional weight was about equal to the weight saved by not having metal wing joiners. The tubes were so stiff I thought I’d get away without having LE sheeting. Some strength was gained by having capped ribs which I’d not done before. So here we go…
I left it at this point and started work on the fuselage but something was bugging me. I’ve never covered a big wing that lacks LE sheeting and started to worry about how much the fore/aft tension of the Diacov 1000 (rather like Solartex) might sag between the capped ribs. It would only have sag by 1/16″ to come into contact with the front spar which would spoil the shape of the airfoil section between all the ribs. In the end I decided to add eighteen short ‘ribs’ as seen below:
The uncovered wings are plenty stiff enough spanwise but still twist quite easily. Fortunately the info about the covering from Sarik Hobbies says that Diacov 1000 “substantially reinforces all structures to which it is applied without stretching too much”. So all should be well. Now back to the fuselage…
5Metre K7 build update from John
The K7 continues to grow slowly and the bags of laser cut parts are starting to diminish. After doing all I could to the fuselage I started on the tail end. The fin is integral to the fuselage so a rudder was next and fairly straightforward, made of balsa and 0.4. ply. A double horn was made from G10 2mm fibre board, very hard but files well. The closed loop cables will connect to this.
Lots of laser cut parts went together to construct the tail plane and this was covered in 0.4 ply as is the fin, all very strong but getting heavy! Elevators x 2 of built up structure are driven by 2 servos in the tail plane.
I made a mistake with the hinging and got the hinge line in the incorrect axis but hope to address this later.
As it is quite thick at the hinge line and the elevator needs to swivel rather than just move up and down.
I have now begun the first wing, will be in touch! ( Robert: Looking forward to some build clips John)
If anyone subscribes to the forum on Scale Soaring UK, further posts from John on building his Jilles Smits 1/3 K7 Build