There’s something rather satisfying about the first time it all comes together, wings, fuse, legs, and tail feathers, and pinning the control surfaces on. Pre-covering photos seem to be a bit of a tradition:
I covered the wings in Diacov 1000 from Sarik Hobbies which is an “Extra-lightweight iron-on polyester fabric” probably rather like Solartex or Oratex but I’d never used one of those so it was all rather new to me. It cost £33 for 3 metres by 73cm which John says is expensive but I must say it goes on like a dream. Just stretchy enough to wrap around compound curves when warm but adds tremendous rigidity after cooling, shrinks perfectly and looks great. Slightly translucent and slightly more so when varnished. I used polyurethane spray for the wings and brushed on the tail. Spray looks much better.
I cut the signwriting out of film covering and ironed it on before varnishing. Adhesion was really good.
For the fuselage I used cheap-as-chips transparent dark purple from Ali Express. The roll arrived damaged and their customer service was rubbish but enough of the film was useable and the value for money was great. Covering the stringers was probably the most challenging film covering I’ve ever attempted – curves galore.
I’m hoping that Winnie the Pooh turns out to be a good pilot. Apparently he’s had quite a bit of practice flying balloons with Piglet.
Installing the radio gear was pretty uneventful but the lightweight snakes I’d bought from SLEC weren’t up to the job at all. In the very short distance between the tube ends and the control horns they bent all over the place so I had to use piano wire instead. Fortunately the runs were fairly straight and the wire quite light.
On advice from model designer Peter Miller I went for zero angle of attack, zero tailplane angle, and zero down thrust. Although I did add a bit of right thrust and because of the high wing I have a sneaky feeling I will have to add quite a bit of down thrust so the removable cowl will probably need modifying – pretty easy.
The entire motor set up, the servos, and u/c hardware came from George at 4-max who provided great service and advice. SLEC provided great balsa and plywood. Thanks also go to John Harvey for encouragement and Cliff Harvey for inspiration and tips – particularly on laminating balsa curves, and Martin Tonkins for motor chat.
So there we are, my first vintage model. But in truth, of course. Although she looks old. She has no vintage whatsoever. In fact, she’s nothing but an Old Phoney.
POST-MAIDEN UPDATE
Turns out the u/c legs weren’t up to the job so I made a more substantial pair. The wire braces still broke so I switched over to using bowden cable and steel springs – seems to be fine now.
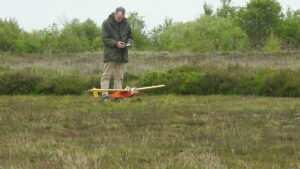
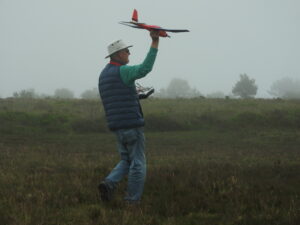
Test flights are going well. I’ve added down thrust and mixed elevator with the throttle. Her speed range is impressive from fast enough right down to extremely slow. Even with full down flaps and holding in full up elevator she doesn’t seem to stall, certainly doesn’t drop a wing anyway. Shortest landing roll I’ve managed was 3 metres in still air.