Back in ‘71/72, we used to fly control line models for three hours every Sunday morning in a field next to The Rowdens at the top of Eastcliff Lane in Teignmouth. Not a silencer in sight. How the neighbours stood the noise I will never know. As far as combat flying and aerobatics were concerned, the model that really stands out in my memory was the ‘Peacemaker’ designed by George Aldrich. Wow. What a great flyer that was! A legend in its own lunchtime. Not many 50 year old designs have their own Facebook page! https://www.facebook.com/George-Aldrich-Peacemaker-411836712594945/ Maybe I could I create a slope soaring version of the Peacemaker?
Whilst researching a previous creation, I accidentally came across VTPR high performance aerobatic gliders (VTPR is French for “aerobatics very close to the ground”). If you’ve not seen it before take a look at this https://www.youtube.com/watch?v=_oBuqhEg0xU. I was amazed(!) and set myself the task of creating a new design that combined three things; the shape of a Peacemaker, some of the principals of VTPR design, and my own ideas.
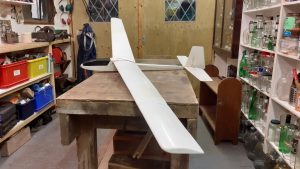
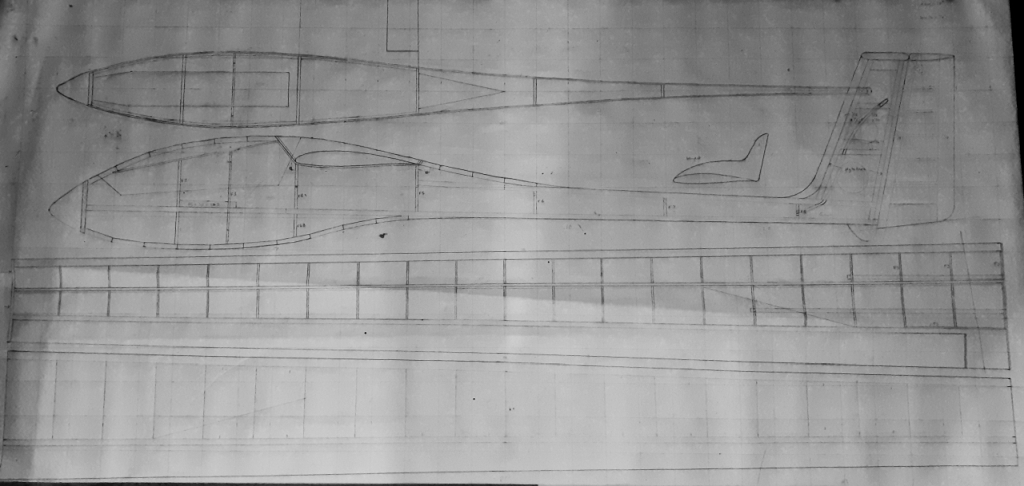
I stretched the Peacemaker’s wing-shape spanwise but kept the aspect ratio still quite low at 1:6.5 rather than 1:4.3. Used a completely different wing structure and airfoil – semi-symetrical SBV96V at the root and symmetrical at the tips – and made the ailerons pretty huge (as per VTPR). I retained the characteristic Peacemaker wing tips and tailplane shape but moved the elevator hinge line forward which dramatically increased the elevator size. I designed the fuselage profile pretty much from scratch. Its wing position is as per VTPR and its canopy and fin shape reminiscent of the Peacemaker but that’s where the similarity ends. I played around with it for ages. The “if it looks right it is right” theory only works if it actually does look right. In the end I’m very happy indeed with its nice curvy outline.
Rubber banded wings are great – delightfully simple and very forgiving in crash – but not so easy with a mid-wing design. After much head scratching I came up with a simple three-piece design. The one piece 54” wing will be banded onto the lower half of the fuse and then the top half of the fuse will be banded over it. Two of the servos will be in the wings – that’s a first for me – which means the fuselage can be unusually narrow (another VTPR design feature) which apparently aids knife edge flying, not that I’m capable of doing it(!) but at least the model might be. So here’s my Plan for the ‘Mediator’…